Save data To MongoDB: Node.js

After learning to connect our Node.js application to MongoDB, lets see how we could insert data into our database collection.
insert-into-mongoDB-nodejs

Note:
Save() is a higher lever method. It checks to see if the object we’re inserting is already present in our collection, by checking the _id value we’re inserting. _id field(which is a primary key in MongoDB document)
– If there is no matching _id field in a document, it’ll call insert method and insert the data. And if the data being entered has no _id value, insert() method will create _id value for us, and insert the data into the collection.
– If _id matches to any document in our collection, it’ll use update() instead to update the previously present data with the new data entered by the user.

Form To Facilitate User To Enter Her Details ..or Registration Form
public/index.html

1
2
3
4
5
6
7
8
9
10
11
12
13
14
15
16
17
< !DOCTYPE html>
<html>
<head>
<title>Registration Form</title>
</head>
<body>
 <form action="/new" method="POST">
<label for="email">Email: </label>
  <input type="email" name="email" /><br />
<label for="name">Name: </label>
  <input type="text" name="name" /><br />
<label for="age">Age: </label>
  <input type="number" name="age" /><br />
 <input type="submit"/>
</form>
</body>
</html>

Here we have 3 input fields(for email, name and age) and a submit button. Since we’re posting these data to /new (in the action field of the form), we need to create /new route.

Route To Process User Entries
app.js

1
2
3
4
5
6
7
8
9
10
app.post('/new', function(req, res){
new user({
_id    : req.body.email,
name: req.body.name,
age   : req.body.age
}).save(function(err, doc){
if(err) res.json(err);
else    res.send('Successfully inserted!');
});
});

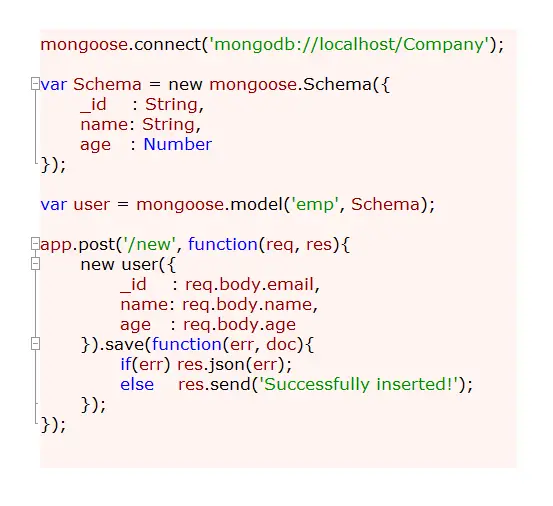
By using bodyParser() middleware, we get the data from the form, parse it and assign the values to corresponding keys, by creating a new user.

Note: user is a model object in our example. We also chain save method with new user object. Save() method takes a callback method as argument. The callback method takes 2 arguments – error and document. We check, if there are any errors while inserting the data, if so, we output the error object on to the screen. If the insertion was successful, we display “Successfully inserted!” message.

Inserting data To MongoDB: Node.js


[youtube https://www.youtube.com/watch?v=uZqwHfNIf8M]

YouTube Link: https://www.youtube.com/watch?v=uZqwHfNIf8M [Watch the Video In Full Screen.]


Related Read:
number Input Type: HTML5
Create and Insert Documents: MongoDB
MongoDB Tutorial List

Full Code
app.js

1
2
3
4
5
6
7
8
9
10
11
12
13
14
15
16
17
18
19
20
21
22
23
24
25
26
27
28
29
30
31
32
33
34
35
36
37
38
39
40
41
42
43
var express = require('express');
var http = require('http');
var path = require('path');
var mongoose = require('mongoose');
 
var app = express();
 
// all environments
app.set('port', process.env.PORT || 3000);
app.set('views', __dirname + '/views');
app.set('view engine', 'jade');
 
app.use(express.bodyParser());
app.use(express.methodOverride());
app.use(app.router);
app.use(express.static(path.join(__dirname, 'public')));
 
mongoose.connect('mongodb://localhost/Company');
 
var Schema = new mongoose.Schema({
_id    : String,
name: String,
age   : Number
});
 
var user = mongoose.model('emp', Schema);
 
app.post('/new', function(req, res){
new user({
_id    : req.body.email,
name: req.body.name,
age   : req.body.age
}).save(function(err, doc){
if(err) res.json(err);
else    res.send('Successfully inserted!');
});
});


var server = http.createServer(app).listen(app.get('port'), function(){
  console.log('Express server listening on port ' + app.get('port'));
});

Here we’ve shown the configurations, middleware, mongoose connection, schema, model object, routes and out application server.

Auto Restart Server With NoDemon: Node.js

As we have already started using Web Framework of Node.js i.e., Express, we’ll be building considerably large web applications, and it needs us to edit the files often. We need to restart the server every time we save changes to main application file. This would start consuming lot of time and sometimes we may forget to restart the server and may think that our application file has bugs, as it doesn’t reflect on the browser!

node-server-auto-restart

To solve this issue, we could make use of some dependency modules which listens to the changes we saved to these main node application file and restarts the server automatically by itself.

Package File
package.json

1
2
3
4
5
6
7
8
9
10
11
12
13
{
  "name": "route-app",
  "version": "0.0.1",
  "private": true,
  "scripts": {
    "start": "node app.js"
  },
  "dependencies": {
    "express": "3.4.0",
    "jade": "*",
    "nodemon": "*"
  }
}

As you can see we have added nodemon as a dependency to our application.

Local Module Installation
installation of dependencies

1
npm install

This installs all the dependencies listed in package.json file. If some of the dependencies are already installed, it ignores such things and installs the new dependencies listed in package.json file.

1
nodemon app.js

Since NoDemon is a local module to our application, you can not execute your node application using above command. However there is a simple work around for this:

Change starting point of execution
package.json

1
2
3
4
5
6
7
8
9
10
11
12
13
{
  "name": "route-app",
  "version": "0.0.1",
  "private": true,
  "scripts": {
    "start": "nodemon app.js"
  },
  "dependencies": {
    "express": "3.4.0",
    "jade": "*",
    "nodemon": "*"
  }
}

In above file we change the value of start from node app.js to nodemon app.js

Execution Command
Command Prompt / Console

1
npm start

Now this command would trigger the nodemon app.js present inside package.json file, which is local to our specific application.

Auto Restart Server With NoDemon: Node.js


[youtube https://www.youtube.com/watch?v=eMZZa1nh8iY]

YouTube Link: https://www.youtube.com/watch?v=eMZZa1nh8iY [Watch the Video In Full Screen.]


Now whenever we make changes to app.js file, and hit save, nodemon object listens to the new changes we saved, and restarts the server. This way we save a lot of time while in development mode, and directly see the changes reflect on our web browser almost immediately upon refreshing the web browser.

Note: Changes to files in public directory and the .jade files doesn’t require a server restart to reflect on the browser. These are files which are simply rendered upon calling, so whatever is present in these files are [compiled and] shown whenever there is a request to it.

Canvas State: HTML5

Today lets learn about canvas states, which will come handy once we start drawing complex shapes/graphics. Canvas state keeps track of current values of lineWidth, strokeStyle, fillStyle, lineCap, transformation matrix, clipping regions etc.

Backup-Recovery

Each time we save a state, it’s pushed onto a stack of saved states from which we can restore the state later.

HTML file
index.html

1
2
3
4
5
6
7
8
9
10
11
12
13
14
15
16
< !DOCTYPE HTML>
<html>
<head>
<title>Canvas: HTML5</title>
<meta charset="utf-8"/>
<link href="myStyle.css" rel="stylesheet" />
<script src="myScript.js"></script>
</head>
<body>
 
<canvas id="myCanvas" width="200" height="200">
  Upgrade Browser
 </canvas>
 
</body>
</html>

HTML5 document with a canvas element which has an id and 200px width and height.
It’s also attached with an external stylesheet and a javascript file.

StyleSheet file
myStyle.css

1
2
3
canvas {
border: 2px dotted black;
}

Here we’re selecting canvas element and assigning it a 2px thick black dotted border.

JavaScript file
myScript.js

1
2
3
4
5
6
7
8
9
10
context.fillStyle   = "red";
context.fillRect(10, 10, 50, 50);
context.save();
 
context.fillStyle   = "blue";
context.fillRect(20, 20, 75, 75);
 
 
context.restore();
context.fillRect(30, 30, 100, 100);

We have 3 rectangle boxes.
First one is filled with red color.
Second one is filled with blue color.

Using save() method, we have saved the fillStyle property value.
Now we restore fillStyle property before drawing the third rectangle.
Saved canvas state has fillStyle as red, so our third rectangle gets red color.

JavaScript file
myScript.js

1
2
3
4
5
6
7
8
9
10
11
context.fillStyle   = "red";
context.fillRect(10, 10, 50, 50);
context.save();
 
context.fillStyle   = "blue";
context.fillRect(20, 20, 75, 75);
context.save();
 
context.restore();
context.restore();
context.fillRect(30, 30, 100, 100);

Here we’re saving canvas states twice.

Canvas State Stack
blue left_arrow 2nd in.

red left_arrow 1st in.

Canvas State Calls
1st restore call right_red_arrow blue

2nd restore call right_red_arrow red

Hence, now third rectangle will be red colored.

Canvas State: HTML5


[youtube https://www.youtube.com/watch?v=1oBlAhoa9zI]

YouTube Link: https://www.youtube.com/watch?v=1oBlAhoa9zI [Watch the Video In Full Screen.]


Full JavaScript Code
myScript.js

1
2
3
4
5
6
7
8
9
10
11
12
13
14
15
16
17
18
19
20
21
22
23
24
window.onload = canvas;
 
function canvas()
{
var myCanvas = document.getElementById("myCanvas");
 
if( myCanvas && myCanvas.getContext("2d") ) 
{
var context         = myCanvas.getContext("2d");
 
context.fillStyle   = "red";
context.fillRect(10, 10, 50, 50);
context.save();
 
context.fillStyle   = "blue";
context.fillRect(20, 20, 75, 75);
context.save();
 
context.restore();
context.restore();
context.fillRect(30, 30, 100, 100);
 
}
}

Related read:
Canvas Basics: HTML5
Draw Rectangle: HTML5 Canvas

Instantly we could think of building “undo” feature for our drawing board application with the help of canvas state stack!

Create and Insert Documents: MongoDB

In this video tutorial, we’ll look at the basic differences between MongoDB and traditional Database Management Systems. Also, commands to create database, collection, documents – insertion.

Topic of discussion:
Key differences.
Keyword differences.
Schema-free collection.
Database creation.
Creation of Collection.
Insertion of Documents.
JavaScript Console/Shall.

Some Commands

Show Database Already Present

1
show dbs

Create Database

1
use company

In MongoDB, it’ll never actually create any database or collection until we start storing documents in it!

Point object ‘db’ to our new database, by switching to company database

1
2
3
4
>use company
Switched to db company 
>db
company

Naming our Collection

1
db.info

So our collection name is info

Number of documents present

1
db.info.count()

using count() method, we check the no of documents present inside info collection.

Inserting document into Collection

1
2
3
4
5
db.info.insert({
 name     : 'Apple',
 product  : 'iPhone5S',
 emp_no   : 100
});

This inserts our first record.
insert() is the method, which accepts key-value pair object as it’s parameter.

JavaScript Shall
Since, this is a JavaScript shall, we can write any valid JavaScript code and interact directly with MongoDB.

Lets see another method to insert documents into the same collection.

Using save method

1
2
3
4
5
6
7
8
9
>var data = {}
>data.name = 'Technotip IT Solutions'
>data.product = 'Video Tutorials - Educational'
>data.emp = [ 'Satish', 'Kiran' ]
>data.videos = {}
>data.videos.mongo = 'MongoDB videos'
>data.videos.php = 'PHP Video Tutorials'
 
>db.info.save(data);

We create a JSON object data.
We start storing { key: value } pair into it.
emp is an array, which contains name of 2 employees.
videos is a sub object.

Now using save method we insert this data object into info collection.

Save()
Save() is a higher lever method. It checks to see if the object we’re inserting is already present in our collection, by checking the _id value we’re inserting. _id field(which is a primary key in MongoDB document)
– If there is no matching _id field in a document, it’ll call insert method and insert the data. And if the data being entered has no _id value, insert() method will create _id value for us, and insert the data into the collection.
– If _id matches to any document in our collection, it’ll use update() instead to update the previously present data with the new data entered by the user.

Database, Collections, Documents: MongoDB


[youtube https://www.youtube.com/watch?v=yAjG_fC6fPU]

YouTube Link: https://www.youtube.com/watch?v=yAjG_fC6fPU [Watch the Video In Full Screen.]


Note:
There is no Schema for our collection. i.e., no column name and datatype.
Since documents are in BSON format, insertion and finding data is much faster.

Schema-free design is flexible and is of much use in modern day web application.

Example: Users upload photos and tag names of people in the pic. This can be stored as an array of tags in a key value pair, for only those pics which has tags. For other pics, we need not create this array itself. This is flexible. Also BSON format helps create application with high Scalability.