Remove / Delete Data From MongoDB: Node.js

Today lets learn how to delete documents from MongoDB collection via your node.js application.

remove-delete-data-mongoDB-nodejs

In this video tutorial, I’ll show you how to make use of normal app.get to delete data and also the use of app.delete to accomplish the same.

Related Read:
Connecting To MongoDB Using Mongoose: Node.js
Save data To MongoDB: Node.js
Fetch Data From MongoDB: Node.js
Fetch Individual User Data From MongoDB: Node.js
Update / Edit Data In MongoDB: Node.js
..please go through these tutorials before proceeding further. It’ll take less than 20 min

Adding Delete link
view/show.jade

1
2
3
4
5
6
7
8
<h1>#{user.name}</h1>
ul
 li Age: #{user.age}
 li Email: #{user._id}
 
ul
 li 
  a(href="/user/#{user._id}/delete") Delete

This adds Delete link below each individual user information.

Delete Routes: remove()
app.js

1
2
3
4
5
6
7
8
9
var user = mongoose.model('emp', Schema);
 
app.get('/user/:id/delete', function(req, res){
user.remove({_id: req.params.id}, 
   function(err){
if(err) res.json(err);
else    res.redirect('/view');
});
});

Here we simply make use of app.get and the route we are defining is /user/:id/delete Once the user clicks on the delete link with the user id in it, the route gets triggered and by using remove() method upon user object, we fetch the user data with the particular id that the user passed in from the URL and delete it from our mongoDB collection.

Delete Routes: findByIdAndRemove()
app.js

1
2
3
4
5
6
7
8
9
var user = mongoose.model('emp', Schema);
 
app.get('/user/:id/delete', function(req, res){
user.findByIdAndRemove({_id: req.params.id}, 
   function(err, docs){
if(err) res.json(err);
else    res.redirect('/view');
});
});

Here we are using findByIdAndRemove() method of mongoose module to find the requested user and delete the user document. Syntax is same as remove() method, only change is, findByIdAndRemove() method also returns result object to the callback method along with error object.

app.delete
view/show.jade

1
2
3
4
5
6
7
8
9
10
11
12
<h1>#{user.name}</h1>
ul
 li Age: #{user.age}
 li Email: #{user._id}
 
ul
 li 
  a(href="/user/#{user._id}/edit") Edit
 li
  form(action="/user/#{user._id}", method="POST")
   input(type="hidden", name="_method", value="DELETE")
   button(type="submit") Delete

Here we replace the delete link with a delete button. Here the action field value is /user/#{user._id} and the method used is POST. But we are also passing a hidden input field which overrides the method from POST to DELETE inside our node application.

Delete Routes: app.delete() and findByIdAndRemove()
app.js

1
2
3
4
5
6
7
8
9
var user = mongoose.model('emp', Schema);
 
app.delete('/user/:id', function(req, res){
user.findByIdAndRemove({_id: req.params.id}, 
   function(err, docs){
if(err) res.json(err);
else    res.redirect('/view');
});
});

The findByIdAndRemove() method works the same way as explained above.

Delete Routes: app.delete() and remove()
app.js

1
2
3
4
5
6
7
8
9
var user = mongoose.model('emp', Schema);
 
app.delete('/user/:id', function(req, res){
user.remove({_id: req.params.id}, 
   function(err){
if(err) res.json(err);
else    res.redirect('/view');
});
});

The remove() method works the same way as explained above.

Remove / Delete Data From MongoDB: Node.js


[youtube https://www.youtube.com/watch?v=WFIuVGdmbPo]

YouTube Link: https://www.youtube.com/watch?v=WFIuVGdmbPo [Watch the Video In Full Screen.]


Full Source Code

new user registration form
public/index.html

1
2
3
4
5
6
7
8
9
10
11
12
13
14
15
16
17
< !DOCTYPE html>
<html>
<head>
<title>Registration Form</title>
</head>
<body>
 <form action="/new" method="POST">
<label for="email">Email: </label>
  <input type="email" name="email" /><br />
<label for="name">Name: </label>
  <input type="text" name="name" /><br />
<label for="age">Age: </label>
  <input type="number" name="age" /><br />
 <input type="submit"/>
</form>
</body>
</html>

Link to all registered users
view/index.jade

1
2
3
4
ul
each user in users
 li
  a(href='/user/#{user._id}') #{user.name}

Edit form
view/edit-form.jade

1
2
3
4
5
6
7
8
9
<h1>Editing #{user.name}'s profile!</h1>
form(method="POST", action="/user/#{user._id}")
 input(type="hidden", name="_method", value="PUT")
 p Name:
  input(type="text", name="name", value="#{user.name}")
 p Age:
  input(type="number", name="age", value="#{user.age}")
 p
  input(type="submit")

Show Individual User Information
view/show.jade

1
2
3
4
5
6
7
8
9
10
11
12
<h1>#{user.name}</h1>
ul
 li Age: #{user.age}
 li Email: #{user._id}
 
ul
 li 
  a(href="/user/#{user._id}/edit") Edit
 li
  form(action="/user/#{user._id}", method="POST")
   input(type="hidden", name="_method", value="DELETE")
   button(type="submit") Delete

Main Node.js Application File, with Create, Read, Update and Delete Routes
app.js

1
2
3
4
5
6
7
8
9
10
11
12
13
14
15
16
17
18
19
20
21
22
23
24
25
26
27
28
29
30
31
32
33
34
35
36
37
38
39
40
41
42
43
44
45
46
47
48
49
50
51
52
53
54
55
56
57
58
59
60
61
62
63
64
65
66
67
68
69
70
71
72
73
74
75
76
77
78
79
80
81
82
83
84
85
86
87
88
89
90
91
92
var express = require('express');
var http = require('http');
var path = require('path');
var mongoose = require('mongoose');
 
var app = express();
 
// all environments
app.set('port', process.env.PORT || 3000);
app.set('views', __dirname + '/views');
app.set('view engine', 'jade');
 
app.use(express.bodyParser());
app.use(express.methodOverride());
app.use(app.router);
app.use(express.static(path.join(__dirname, 'public')));
 
mongoose.connect('mongodb://localhost/Company');
 
var Schema = new mongoose.Schema({
_id    : String,
name: String,
age   : Number
});
 
var user = mongoose.model('emp', Schema);
 
app.delete('/user/:id', function(req, res){
user.findByIdAndRemove({_id: req.params.id}, 
   function(err, docs){
if(err) res.json(err);
else    res.redirect('/view');
});
});
 
app.get('/user/:id/edit', function(req, res){
res.render('edit-form', {user: req.userId});
});
 
app.put('/user/:id', function(req, res){
user.findByIdAndUpdate({_id: req.params.id},
                   {
     name: req.body.name,
  age   : req.body.age
   }, function(err, docs){
 if(err) res.json(err);
else
{ 
   console.log(docs);
   res.redirect('/user/'+req.params.id);
 }
 });
});
 
app.param('id', function(req, res, next, id){
user.findById(id, function(err, docs){
if(err) res.json(err);
else
{
req.userId = docs;
next();
}
});
});
 
 
app.get('/user/:id', function(req, res){
res.render('show', {user: req.userId});
});
 
app.get('/view', function(req, res){
user.find({}, function(err, docs){
if(err) res.json(err);
else    res.render('index', {users: docs})
});
});
 
app.post('/new', function(req, res){
new user({
_id    : req.body.email,
name: req.body.name,
age   : req.body.age
}).save(function(err, doc){
if(err) res.json(err);
else    res.redirect('/view');
});
});
 
 
var server = http.createServer(app).listen(app.get('port'), function(){
  console.log('Express server listening on port ' + app.get('port'));
});

Routes
/ for new entries
/view for viewing all the users
/user/:id to see individual user information
/user/:id/edit to edit individual user information

With these tutorials you can start building fully functional web application. But to make it more secure, incorporate sessions, validation and error handling.

Update / Edit Data In MongoDB: Node.js

Today lets look at editing and updating user entered data via Node.js application.

edit-update-data-mongoDB-nodejs

Related Read:
Connecting To MongoDB Using Mongoose: Node.js
Save data To MongoDB: Node.js
Fetch Data From MongoDB: Node.js
Fetch Individual User Data From MongoDB: Node.js
..please go through these 4 tutorials before proceeding further. It’ll take less than 20 min

link to individual profile page
view/index.jade

1
2
3
4
ul
each user in users
 li
  a(href='/user/#{user._id}') #{user.name}

This displays list of all the users with their name, hyper-linked with their email id(present inside _id).

Adding Edit link
view/show.jade

1
2
3
4
5
6
7
8
<h1>#{user.name}</h1>
ul
 li Age: #{user.age}
 li Email: #{user._id}
 
ul
 li 
  a(href="/user/#{user._id}/edit") Edit

This adds Edit link below each individual user information.

Edit Form
view/edit-form.jade

1
2
3
4
5
6
7
8
9
<h1>Editing #{user.name}'s profile!</h1>
form(method="POST", action="/user/#{user._id}")
 input(type="hidden", name="_method", value="PUT")
 p Name:
  input(type="text", name="name", value="#{user.name}")
 p Age:
  input(type="number", name="age", value="#{user.age}")
 p
  input(type="submit")

It shows a message letting know the user, which user’s information they are editing. Also it fills the previous values for name and age. You can find a hidden field with the name _method, which helps to override POST method, and facilitates PUT method.

Edit and Update Routes
app.js

1
2
3
4
5
6
7
8
9
10
11
12
13
14
15
16
17
18
19
20
21
22
23
24
25
app.get('/user/:id/edit', function(req, res){
res.render('edit-form', {user: req.userId});
});
 
app.put('/user/:id', function(req, res){
user.update({_id: req.params.id},
                   {
     name: req.body.name,
  age   : req.body.age
   }, function(err, docs){
 if(err) res.json(err);
else    res.redirect('/user/'+req.params.id);
 });
});
 
app.param('id', function(req, res, next, id){
user.findById(id, function(err, docs){
if(err) res.json(err);
else
{
req.userId = docs;
next();
}
});
});

Here id matches the param call, and using findById() method of mongoose, it fetches all the users present in the database. Once we call next(), it passes the control to next level. At /user/:id/edit route, we render edit-form.jade file and pass it with user information, to be filled inside the form input fields.

Once the user makes changes to the values and submits the form, all the values are passed to /user/:id route. In /user/:id route, we call update() method and specify which user information has to be updated in its first parameter, in second parameter we specify all the fields to be updated, and the third parameter is a callback method and it only takes error object as argument.

Using findByIdAndUpdate() method
app.js

1
2
3
4
5
6
7
8
9
10
11
12
13
14
app.put('/user/:id', function(req, res){
user.findByIdAndUpdate({_id: req.params.id},
                   {
     name: req.body.name,
  age   : req.body.age
   }, function(err, docs){
 if(err) res.json(err);
else
{ 
   console.log(docs);
   res.redirect('/user/'+req.params.id);
 }
 });
});

Syntax of findByIdAndUpdate() method is same as that of update(), only difference is, findByIdAndUpdate() returns the result object as well as error object to the callback method. We can make use of result object to our advantage – in our above example, I’m simply illustrating the concept by logging the result object on to the console window.

Update / Edit Document In MongoDB: Node.js


[youtube https://www.youtube.com/watch?v=wdja8tYsvK8]

YouTube Link: https://www.youtube.com/watch?v=wdja8tYsvK8 [Watch the Video In Full Screen.]


Full Source Code: with findByIdAndUpdate() method
app.js

1
2
3
4
5
6
7
8
9
10
11
12
13
14
15
16
17
18
19
20
21
22
23
24
25
26
27
28
29
30
31
32
33
34
35
36
37
38
39
40
41
42
43
44
45
46
47
48
49
50
51
52
53
54
55
56
57
58
59
60
61
62
63
64
65
66
67
68
69
70
71
72
73
74
75
76
77
78
79
80
81
82
83
var express = require('express');
var http = require('http');
var path = require('path');
var mongoose = require('mongoose');
 
var app = express();
 
// all environments
app.set('port', process.env.PORT || 3000);
app.set('views', __dirname + '/views');
app.set('view engine', 'jade');
 
app.use(express.bodyParser());
app.use(express.methodOverride());
app.use(app.router);
app.use(express.static(path.join(__dirname, 'public')));
 
mongoose.connect('mongodb://localhost/Company');
 
var Schema = new mongoose.Schema({
_id    : String,
name: String,
age   : Number
});
 
var user = mongoose.model('emp', Schema);
 
app.get('/user/:id/edit', function(req, res){
res.render('edit-form', {user: req.userId});
});
 
app.put('/user/:id', function(req, res){
user.findByIdAndUpdate({_id: req.params.id},
                   {
     name: req.body.name,
  age   : req.body.age
   }, function(err, docs){
 if(err) res.json(err);
else
{ 
   console.log(docs);
   res.redirect('/user/'+req.params.id);
 }
 });
});
 
app.param('id', function(req, res, next, id){
user.findById(id, function(err, docs){
if(err) res.json(err);
else
{
req.userId = docs;
next();
}
});
});
 
 
app.get('/user/:id', function(req, res){
res.render('show', {user: req.userId});
});
 
app.get('/view', function(req, res){
user.find({}, function(err, docs){
if(err) res.json(err);
else    res.render('index', {users: docs})
});
});
 
app.post('/new', function(req, res){
new user({
_id    : req.body.email,
name: req.body.name,
age   : req.body.age
}).save(function(err, doc){
if(err) res.json(err);
else    res.redirect('/view');
});
});
 
var server = http.createServer(app).listen(app.get('port'), function(){
  console.log('Express server listening on port ' + app.get('port'));
});

/ for new entries
/view for viewing all the users
/user/:id to see individual user information
/user/:id/edit to edit individual user information

Note:
In real-world applications, it would make sense if only you are allowed to edit and update your data. To accomplish this – once the user logs in, store her _id value in a session variable. While the user issues an edit/update for a particular id, make sure the id she is requesting for edit/update matches with that present in the session variable!

Forms Using Jade: Node.js

Forms are one of the important components of web application. You need registration form, login form, edit form, status update form etc ..

forms-in-Jade-nodejs

In this video tutorial we shall see how to write the form in Jade, and how to use Twitter Bootstrap to design the form (we just show you how to add the id or class tags and not actual bootstrap implementation – but if you need any help, you can always ask us in the comment section below).

Related Read:
Basics of Jade – Template Engine: Node.js
Loops and Conditions In Jade: Node.js
Mixins in Jade: Node.js

Route To Render Form
app.js

1
2
3
app.get('/edit', function(req, res){
 res.render('edit-form');
});

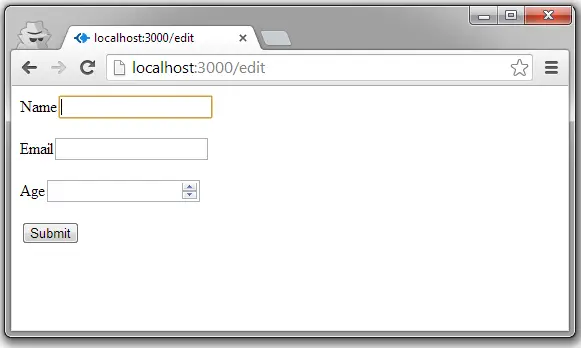
We define a route /edit and once someone visits this route, we render our edit-form.jade template file.

Form tags in Jade
edit-form.jade

1
2
3
4
5
6
7
8
9
10
form(method="POST", action="/user")
 input(type="hidden", name="_method", value="PUT")
 p Name
  input(type="text", name="name")
 p Email
  input(type="email", name="email")
 p Age
  input(type="number", name="age")
 p
  input(type="submit")

Here we indent input tags inside paragraph tags, which is a child of form. We separate form attributes using comma.

Forms Using Jade: Node.js


[youtube https://www.youtube.com/watch?v=1RC9re_llx0]

YouTube Link: https://www.youtube.com/watch?v=1RC9re_llx0 [Watch the Video In Full Screen.]


Form tags with Jade and Bootstrap
edit-form.jade

1
  input#btn(type="submit")

If you want to use bootstrap along with your jade template files, make sure to include bootstrap.min.css and bootstrap.min.js and jquery.min.js into your file, by opening layout.jade present inside your view folder. Now add the id or class names along with the html tags, this should render you bootstrap enabled functionality and styling.

Form output source code
view-source:localhost:3000/edit

1
2
3
4
5
6
7
<form method="POST" action="/user">
 <input type="hidden" name="_method" value="PUT"/>
 <p>Name<input type="text" name="name"/></p>
 <p>Email<input type="email" name="email"/></p>
 <p>Age<input type="number" name="age"/></p>
 <p><input type="submit"/></p>
</form>

You can observe the nesting of elements and their relationship – child and parent.

Fetch Data From MongoDB: Node.js

What’s the use of the data in database, if we can’t fetch it and display on a web page! Today’s video tutorial concentrates on fetching data out of our mongoDB collection and displaying it on the web page.

fetch-data-from-mongoDB-nodejs

Related Read: Save data To MongoDB: Node.js

Route to display registered users
app.js

1
2
3
4
5
6
app.get('/view', function(req, res){
user.find({}, function(err, docs){
if(err) res.json(err);
else    res.render('index', {users: docs});
});
});

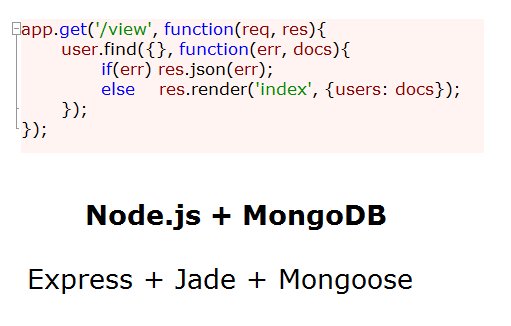
Once the user visits /view route, she will be presented with all the registered users information. Inside /view route, we fetch all the user information by using mongoDB’s find() method. find() takes 2 parameters – first parameter is an object with condition, second parameter is a callback method. If we pass in empty object as first parameter, it means, fetch all the data – similar to SELECT * in sql.

If find() could successfully fetch the data out of mongoDB collection, it renders index.jade file and passes an object to it – which contains information of all the fetched users.

Template To Display User Information
view/index.jade

1
2
3
ul
each user in users
 li #{user.name}: #{user.age}: #{user._id}

Here we loop through users object, fetch individual user information, and display as a list item.

Fetch Data From MongoDB: Node.js


[youtube https://www.youtube.com/watch?v=U0zK-Nb2vn8]

YouTube Link: https://www.youtube.com/watch?v=U0zK-Nb2vn8 [Watch the Video In Full Screen.]


Note: Since email address has been made as _id, each registered user will have a unique email address associated with her.

Fetch individual user information
app.js

1
2
3
4
5
6
app.get('/view', function(req, res){
user.find({_id: '[email protected]'}, function(err, docs){
if(err) res.json(err);
else    res.render('index', {users: docs});
});
});

Observe the find() methods first parameter. Now we are passing _id to it, which means, it has to find and retrieve only the information related to the user with that _id.

Full Code To Insert And Fetch Data into/from MongoDB
app.js

1
2
3
4
5
6
7
8
9
10
11
12
13
14
15
16
17
18
19
20
21
22
23
24
25
26
27
28
29
30
31
32
33
34
35
36
37
38
39
40
41
42
43
44
45
46
47
48
var express = require('express');
var http = require('http');
var path = require('path');
var mongoose = require('mongoose');
 
var app = express();
 
// all environments
app.set('port', process.env.PORT || 3000);
app.set('views', __dirname + '/views');
app.set('view engine', 'jade');
 
app.use(express.bodyParser());
app.use(express.methodOverride());
app.use(app.router);
app.use(express.static(path.join(__dirname, 'public')));
 
mongoose.connect('mongodb://localhost/Company');
 
var Schema = new mongoose.Schema({
_id    : String,
name: String,
age   : Number
});
 
var user = mongoose.model('emp', Schema);
 
app.get('/view', function(req, res){
user.find({}, function(err, docs){
if(err) res.json(err);
else    res.render('index', {users: docs});
});
});
 
app.post('/new', function(req, res){
new user({
_id    : req.body.email,
name: req.body.name,
age   : req.body.age
}).save(function(err, doc){
if(err) res.json(err);
else    res.redirect('/view');
});
});
 
var server = http.createServer(app).listen(app.get('port'), function(){
  console.log('Express server listening on port ' + app.get('port'));
});

To make this work, go to Save data To MongoDB: Node.js tutorial page and copy the index.html page code and create one for your project and put it inside public directory. Now you can directly access root(html form), enter user information and submit, which redirects to /view route, wherein you get the information of all the registered users.

Note: Make sure MongoDB server is running and turned on, when you start Node.js server and access your application from web browser.

Related Read: MongoDB – Getting Started Guide

Mixins in Jade: Node.js

Mixins in Jade are much like functions/methods in many other programming languages.

mixin-jade-express-nodejs

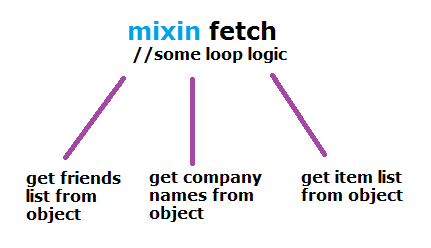
Basically, if you’re repeating your code at many places, you could place that code inside a mixin and replace your code with the mixin call. This would make your code cleaner and maintainable over long run.

Related Read: Loops and Conditions In Jade: Node.js

mixins in Jade
mixin.jade

1
2
3
4
mixin fetch(users)
 ul
 -each user in users
  li= user

This would get the users as argument – loop through each user and put the individual user in the list item of an unordered list.

include in index file: Jade
index.jade

1
2
3
4
5
6
7
8
9
include mixin
 
- users = ["Apple", "IBM"];
mixin fetch(users)
 
<br /><br />
 
- users = ["Google", "Amazon"];
mixin fetch(users)

Here we have included the mixin.jade file, and now use our fetch mixin and pass-in our array variable, which is converted into an unordered list of items and output on the browser.

Mixins in Jade: Node.js


[youtube https://www.youtube.com/watch?v=g6DPkVpfauc]

YouTube Link: https://www.youtube.com/watch?v=g6DPkVpfauc [Watch the Video In Full Screen.]


Note: Clearly, in real-time applications the array or object come from the database.
Example: You might encounter the situation to list out all the users in your list and list of all the participating companies. Or list of all companies someone has worked at. In such cases you’ll get an array of objects which you need to out put to the user in a well formatted manner. In situations like this, mixins are a great tool to have, to avoid the necesity to repeat your code allover your application.

Have all your mixins in a single file and then include that file wherever you are calling your mixins.