Lets learn about implementation of Sharing of images, URL, messages to Facebook, Twitter, Email, SMS, WhatsApp via ionic application, using cordova social sharing plugin.
Topics covered
1. Installing and removing cordova plugins
2. about icon class
3. social sharing plugin implementation
4. writing view code
5. connecting controller and view code for social sharing
Software Versions used for the demo
1. Node: v4.2.6
2. Cordova: 6.0.0
3. Ionic: 1.7.14
4. android: Android 6.0 (API level 23)
5. OS: Demo showed on Windows 10 Operating System.
6. Social Sharing Plugin: 5.0.11
(cordova plugin name: cordova-plugin-x-socialsharing)
Getting Started
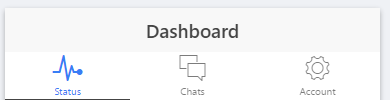
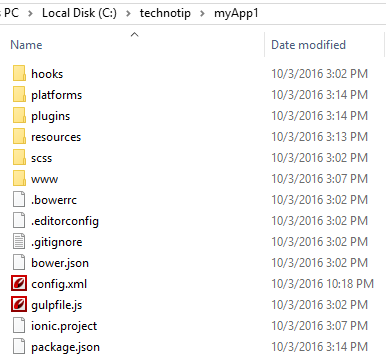
We’re using basic/default tabbed ionic template in this project, which we created in Getting Started With IONIC APP video tutorial. At the end of the tab-dash.html page we implement social sharing feature.
[youtube https://www.youtube.com/watch?v=-5yefISeGKI]
Installing social sharing plugin
cordova plugin add [email protected] |
HTML snippet / view code
<div class="card">
 <div class="item item-text-wrap row">
   <button class="button button-light col col-20">
       <i class="icon ion-social-whatsapp"></i>
   </button>
   <button class="button button-light col col-20">
       <i class="icon ion-social-facebook"></i>
   </button>
   <button class="button button-light col col-20">
       <i class="icon ion-social-twitter"></i>
   </button>
   <button class="button button-light col col-20">
       <i class="icon ion-android-textsms"></i>
   </button>
   <button class="button button-light col col-20">
       <i class="icon ion-ios-email"></i>
   </button>
 </div>
</div> |
Here we are making use of lighter color button, and to make the user experience better. We have also used ionic icons of different social platforms like Facebook, Twitter, WhatsApp and SMS, email. You can get all icons and their classes at ionicons.com
For consistent spacing we are using Ionic Grid System.
Controller Code
.controller('Social', ['$scope', function($scope){
    $scope.share = function(t, msg, img, link){
        if(t == 'w')
            window.plugins.socialsharing
            .shareViaWhatsApp(msg, '', link);
        else if(t == 'f')
            window.plugins.socialsharing
            .shareViaFacebook(msg, img, link);
        else if(t == 't')
            window.plugins.socialsharing
            .shareViaTwitter(msg, img, link);
        else if(t == 'sms')
            window.plugins.socialsharing
            .shareViaSMS(msg+' '+img+' '+link);
        else
        {
            var sub = 'Beautiful images inside ..';
            window.plugins.socialsharing
            .shareViaEmail(msg, sub, '');
        }
    }
}]) |
Here we have a controller with name Social. Inside that we have a function called Share, which takes 4 parameters. ‘t’ for target application, ‘msg’ for message, ‘img’ for images, ‘link’ for URL.
If target is for WhatsApp application then we pass the word ‘w’ from the view(when user clicks on WhatsApp icon), which in turn invokes WhatsApp application and pre-fills with the message, image and the link sent by the view as arguments.
When user clicks on Facebook icon, letter ‘f’ is passed as target which invokes Facebook application(if installed on the mobile device), and pre-fills with the message, image and the link.
Similarly for Twitter, SMS application and email clients.
For SMS application
            window.plugins.socialsharing
.shareViaSMS(msg, to); |
It takes 2 parameters. First one being the actual message and the second one being the number to which the message has to be sent. If we leave the second parameter empty, it’ll prompt you to select the numbers from your contact list before sending the message.
For EMAIL clients
  window.plugins.socialsharing
.shareViaEmail(message, subject, toArr, ccArr, bccArr, file) |
toArr, ccArr and bccArr must be an array, file can be either null, string or array. If you only enter first 2 parameters, it still works – it just asks you to enter the recipients email address before sending the mail, via email client.
Image Sharing
For sharing images, we must have the image in our device. We must provide the path of the image as second parameter. If you want to send multiple images, you can send them as an array.
Ex: [‘www/satish.png’,’/images/quotes/technotip.png’]
You can’t send image by specifying remote URLs. You can send images present inside your device, by giving its path as second parameter – for WhatsApp, Facebook, Twitter.
Note: We’ll explain about image download and sending images in coming video tutorials.
Saving images to photo album – iOS only
window.plugins.socialsharing.saveToPhotoAlbum( ['https://technotip.com/images/srpr/logo4w.png','www/image.gif'], onSuccess, // optional success function onError // optional error function ); |
Using saveToPhotoAlbum() function you can save an image to your device, but this only works for iOS as of now. For android we need to make use of plugins to download images from remote sources.
Share-popover on iPad
var targetRect = event.targetElement.getBoundingClientRect(),
    targetBounds = targetRect.left + ',' + targetRect.top + ',' + targetRect.width + ',' + targetRect.height;

window.plugins.socialsharing.setIPadPopupCoordinates(targetBounds);
window.plugins.socialsharing.share('Hello from iOS :)') |
Again this works only on iPads ..
android implementation – connecting view to controller
<div class="card" data-ng-controller="Social">
 <div class="item item-text-wrap row">
   <button ng-click="share('w', 'myMessage', '', 'https://technotip.com');"
                class="button button-light col col-20">
       <i class="icon ion-social-whatsapp"></i>
   </button>
   <button ng-click="share('f', 'myMessage', '', 'https://technotip.com');"
                class="button button-light col col-20">
       <i class="icon ion-social-facebook"></i>
   </button>
   <button ng-click="share('t', 'myMessage', '', 'https://technotip.com');"
                class="button button-light col col-20">
       <i class="icon ion-social-twitter"></i>
   </button>
   <button ng-click="share('sms', 'myMessage', '', 'https://technotip.com');"
                class="button button-light col col-20">
       <i class="icon ion-android-textsms"></i>
   </button>
   <button ng-click="share('email', 'myMessage', '', 'https://technotip.com');"
                class="button button-light col col-20">
       <i class="icon ion-ios-email"></i>
   </button>
 </div>
</div> |
First make sure to connect the view code with our ‘Social’ controller, using ng-controller. Next, pass respective parameters to share() function on click of social sharing icons. On click we first pass the target application information. For WhatsApp its ‘w’, for Facebook its ‘f’, for Twitter its ‘t’, for SMS its ‘sms’, for email its ’email'(though we do not check for it in the controller!). The second parameter is the message, third parameter is the image(path to image stored inside your mobile/table device), and the last parameter is the URL / link.
socialsharing object
We access socialsharing object in the controller via window.plugins class. socialsharing object has different functions which invoke the social sharing applications which are installed on the device. Each of these methods have success and failure callbacks which you can use as required.
Example:
            window.plugins.socialsharing
            .shareViaWhatsApp(msg, '', link, function() {console.log('share ok')},
function(errormsg){alert(errormsg)}); |
i.e., for all the methods the last 2 parameters are for success and error callbacks, which you can make use of according to your application needs.
Working examples
1. HD Wallpapers
2. ScanIT
You can see social sharing working in above applications.
Please share this tutorial link with your friends on social platforms.. and stay subscribed
Hope this helps ..