Today lets learn how to delete documents from MongoDB collection via your node.js application.

In this video tutorial, I’ll show you how to make use of normal app.get to delete data and also the use of app.delete to accomplish the same.
Related Read:
Connecting To MongoDB Using Mongoose: Node.js
Save data To MongoDB: Node.js
Fetch Data From MongoDB: Node.js
Fetch Individual User Data From MongoDB: Node.js
Update / Edit Data In MongoDB: Node.js
..please go through these tutorials before proceeding further. It’ll take less than 20 min
Adding Delete link
view/show.jade
1
2
3
4
5
6
7
8
| <h1>#{user.name}</h1>
ul
li Age: #{user.age}
li Email: #{user._id}
ul
li
a(href="/user/#{user._id}/delete") Delete |
<h1>#{user.name}</h1>
ul
 li Age: #{user.age}
 li Email: #{user._id}

ul
 li
  a(href="/user/#{user._id}/delete") Delete
This adds Delete link below each individual user information.
Delete Routes: remove()
app.js
1
2
3
4
5
6
7
8
9
| var user = mongoose.model('emp', Schema);
app.get('/user/:id/delete', function(req, res){
user.remove({_id: req.params.id},
function(err){
if(err) res.json(err);
else res.redirect('/view');
});
}); |
var user = mongoose.model('emp', Schema);

app.get('/user/:id/delete', function(req, res){
user.remove({_id: req.params.id},
   function(err){
if(err) res.json(err);
else    res.redirect('/view');
});
});
Here we simply make use of app.get and the route we are defining is /user/:id/delete Once the user clicks on the delete link with the user id in it, the route gets triggered and by using remove() method upon user object, we fetch the user data with the particular id that the user passed in from the URL and delete it from our mongoDB collection.
Delete Routes: findByIdAndRemove()
app.js
1
2
3
4
5
6
7
8
9
| var user = mongoose.model('emp', Schema);
app.get('/user/:id/delete', function(req, res){
user.findByIdAndRemove({_id: req.params.id},
function(err, docs){
if(err) res.json(err);
else res.redirect('/view');
});
}); |
var user = mongoose.model('emp', Schema);

app.get('/user/:id/delete', function(req, res){
user.findByIdAndRemove({_id: req.params.id},
   function(err, docs){
if(err) res.json(err);
else    res.redirect('/view');
});
});
Here we are using findByIdAndRemove() method of mongoose module to find the requested user and delete the user document. Syntax is same as remove() method, only change is, findByIdAndRemove() method also returns result object to the callback method along with error object.
app.delete
view/show.jade
1
2
3
4
5
6
7
8
9
10
11
12
| <h1>#{user.name}</h1>
ul
li Age: #{user.age}
li Email: #{user._id}
ul
li
a(href="/user/#{user._id}/edit") Edit
li
form(action="/user/#{user._id}", method="POST")
input(type="hidden", name="_method", value="DELETE")
button(type="submit") Delete |
<h1>#{user.name}</h1>
ul
 li Age: #{user.age}
 li Email: #{user._id}

ul
 li
  a(href="/user/#{user._id}/edit") Edit
 li
  form(action="/user/#{user._id}", method="POST")
   input(type="hidden", name="_method", value="DELETE")
   button(type="submit") Delete
Here we replace the delete link with a delete button. Here the action field value is /user/#{user._id} and the method used is POST. But we are also passing a hidden input field which overrides the method from POST to DELETE inside our node application.
Delete Routes: app.delete() and findByIdAndRemove()
app.js
1
2
3
4
5
6
7
8
9
| var user = mongoose.model('emp', Schema);
app.delete('/user/:id', function(req, res){
user.findByIdAndRemove({_id: req.params.id},
function(err, docs){
if(err) res.json(err);
else res.redirect('/view');
});
}); |
var user = mongoose.model('emp', Schema);

app.delete('/user/:id', function(req, res){
user.findByIdAndRemove({_id: req.params.id},
   function(err, docs){
if(err) res.json(err);
else    res.redirect('/view');
});
});
The findByIdAndRemove() method works the same way as explained above.
Delete Routes: app.delete() and remove()
app.js
1
2
3
4
5
6
7
8
9
| var user = mongoose.model('emp', Schema);
app.delete('/user/:id', function(req, res){
user.remove({_id: req.params.id},
function(err){
if(err) res.json(err);
else res.redirect('/view');
});
}); |
var user = mongoose.model('emp', Schema);

app.delete('/user/:id', function(req, res){
user.remove({_id: req.params.id},
   function(err){
if(err) res.json(err);
else    res.redirect('/view');
});
});
The remove() method works the same way as explained above.
Remove / Delete Data From MongoDB: Node.js
[youtube https://www.youtube.com/watch?v=WFIuVGdmbPo]
Full Source Code
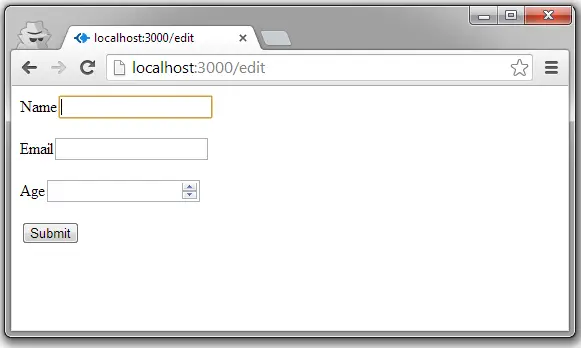
new user registration form
public/index.html
1
2
3
4
5
6
7
8
9
10
11
12
13
14
15
16
17
| < !DOCTYPE html>
<html>
<head>
<title>Registration Form</title>
</head>
<body>
<form action="/new" method="POST">
<label for="email">Email: </label>
<input type="email" name="email" /><br />
<label for="name">Name: </label>
<input type="text" name="name" /><br />
<label for="age">Age: </label>
<input type="number" name="age" /><br />
<input type="submit"/>
</form>
</body>
</html> |
< !DOCTYPE html>
<html>
<head>
<title>Registration Form</title>
</head>
<body>
 <form action="/new" method="POST">
<label for="email">Email: </label>
  <input type="email" name="email" /><br />
<label for="name">Name: </label>
  <input type="text" name="name" /><br />
<label for="age">Age: </label>
  <input type="number" name="age" /><br />
 <input type="submit"/>
</form>
</body>
</html>
Link to all registered users
view/index.jade
1
2
3
4
| ul
each user in users
li
a(href='/user/#{user._id}') #{user.name} |
ul
each user in users
 li
  a(href='/user/#{user._id}') #{user.name}
Edit form
view/edit-form.jade
1
2
3
4
5
6
7
8
9
| <h1>Editing #{user.name}'s profile!</h1>
form(method="POST", action="/user/#{user._id}")
input(type="hidden", name="_method", value="PUT")
p Name:
input(type="text", name="name", value="#{user.name}")
p Age:
input(type="number", name="age", value="#{user.age}")
p
input(type="submit") |
<h1>Editing #{user.name}'s profile!</h1>
form(method="POST", action="/user/#{user._id}")
 input(type="hidden", name="_method", value="PUT")
 p Name:
  input(type="text", name="name", value="#{user.name}")
 p Age:
  input(type="number", name="age", value="#{user.age}")
 p
  input(type="submit")
Show Individual User Information
view/show.jade
1
2
3
4
5
6
7
8
9
10
11
12
| <h1>#{user.name}</h1>
ul
li Age: #{user.age}
li Email: #{user._id}
ul
li
a(href="/user/#{user._id}/edit") Edit
li
form(action="/user/#{user._id}", method="POST")
input(type="hidden", name="_method", value="DELETE")
button(type="submit") Delete |
<h1>#{user.name}</h1>
ul
 li Age: #{user.age}
 li Email: #{user._id}

ul
 li
  a(href="/user/#{user._id}/edit") Edit
 li
  form(action="/user/#{user._id}", method="POST")
   input(type="hidden", name="_method", value="DELETE")
   button(type="submit") Delete
Main Node.js Application File, with Create, Read, Update and Delete Routes
app.js
1
2
3
4
5
6
7
8
9
10
11
12
13
14
15
16
17
18
19
20
21
22
23
24
25
26
27
28
29
30
31
32
33
34
35
36
37
38
39
40
41
42
43
44
45
46
47
48
49
50
51
52
53
54
55
56
57
58
59
60
61
62
63
64
65
66
67
68
69
70
71
72
73
74
75
76
77
78
79
80
81
82
83
84
85
86
87
88
89
90
91
92
| var express = require('express');
var http = require('http');
var path = require('path');
var mongoose = require('mongoose');
var app = express();
// all environments
app.set('port', process.env.PORT || 3000);
app.set('views', __dirname + '/views');
app.set('view engine', 'jade');
app.use(express.bodyParser());
app.use(express.methodOverride());
app.use(app.router);
app.use(express.static(path.join(__dirname, 'public')));
mongoose.connect('mongodb://localhost/Company');
var Schema = new mongoose.Schema({
_id : String,
name: String,
age : Number
});
var user = mongoose.model('emp', Schema);
app.delete('/user/:id', function(req, res){
user.findByIdAndRemove({_id: req.params.id},
function(err, docs){
if(err) res.json(err);
else res.redirect('/view');
});
});
app.get('/user/:id/edit', function(req, res){
res.render('edit-form', {user: req.userId});
});
app.put('/user/:id', function(req, res){
user.findByIdAndUpdate({_id: req.params.id},
{
name: req.body.name,
age : req.body.age
}, function(err, docs){
if(err) res.json(err);
else
{
console.log(docs);
res.redirect('/user/'+req.params.id);
}
});
});
app.param('id', function(req, res, next, id){
user.findById(id, function(err, docs){
if(err) res.json(err);
else
{
req.userId = docs;
next();
}
});
});
app.get('/user/:id', function(req, res){
res.render('show', {user: req.userId});
});
app.get('/view', function(req, res){
user.find({}, function(err, docs){
if(err) res.json(err);
else res.render('index', {users: docs})
});
});
app.post('/new', function(req, res){
new user({
_id : req.body.email,
name: req.body.name,
age : req.body.age
}).save(function(err, doc){
if(err) res.json(err);
else res.redirect('/view');
});
});
var server = http.createServer(app).listen(app.get('port'), function(){
console.log('Express server listening on port ' + app.get('port'));
}); |
var express = require('express');
var http = require('http');
var path = require('path');
var mongoose = require('mongoose');

var app = express();

// all environments
app.set('port', process.env.PORT || 3000);
app.set('views', __dirname + '/views');
app.set('view engine', 'jade');

app.use(express.bodyParser());
app.use(express.methodOverride());
app.use(app.router);
app.use(express.static(path.join(__dirname, 'public')));

mongoose.connect('mongodb://localhost/Company');

var Schema = new mongoose.Schema({
_id    : String,
name: String,
age   : Number
});

var user = mongoose.model('emp', Schema);

app.delete('/user/:id', function(req, res){
user.findByIdAndRemove({_id: req.params.id},
   function(err, docs){
if(err) res.json(err);
else    res.redirect('/view');
});
});

app.get('/user/:id/edit', function(req, res){
res.render('edit-form', {user: req.userId});
});

app.put('/user/:id', function(req, res){
user.findByIdAndUpdate({_id: req.params.id},
                   {
     name: req.body.name,
  age   : req.body.age
   }, function(err, docs){
 if(err) res.json(err);
else
{
   console.log(docs);
   res.redirect('/user/'+req.params.id);
 }
 });
});

app.param('id', function(req, res, next, id){
user.findById(id, function(err, docs){
if(err) res.json(err);
else
{
req.userId = docs;
next();
}
});
});


app.get('/user/:id', function(req, res){
res.render('show', {user: req.userId});
});

app.get('/view', function(req, res){
user.find({}, function(err, docs){
if(err) res.json(err);
else    res.render('index', {users: docs})
});
});

app.post('/new', function(req, res){
new user({
_id    : req.body.email,
name: req.body.name,
age   : req.body.age
}).save(function(err, doc){
if(err) res.json(err);
else    res.redirect('/view');
});
});


var server = http.createServer(app).listen(app.get('port'), function(){
  console.log('Express server listening on port ' + app.get('port'));
});
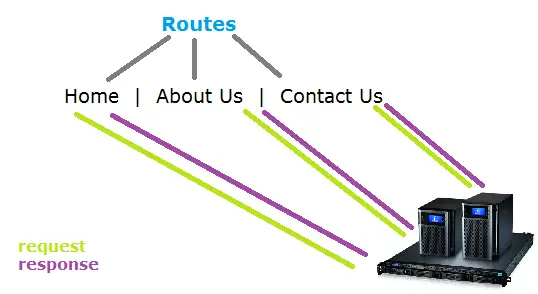
Routes
/ for new entries
/view for viewing all the users
/user/:id to see individual user information
/user/:id/edit to edit individual user information
With these tutorials you can start building fully functional web application. But to make it more secure, incorporate sessions, validation and error handling.