Today lets learn about clipping paths in HTML5 canvas.
In this tutorial, we take an image and display the image only at particular clipping regions on our canvas.
HTML file
index.html
1 2 3 4 5 6 7 8 9 10 11 12 13 14 15 | < !DOCTYPE HTML> <html> <head> <title>Canvas: HTML5</title> <meta charset="utf-8"/> <link href="myStyle.css" rel="stylesheet" /> <script src="myScript.js"></script> </head> <body> <canvas id="myCanvas" width="400" height="400"> Upgrade Browser </canvas> <img id="myImg" src="technotip.jpg" style="display: none;"/> </body> </html> |
Here we have a canvas with 400px width and height. Also an image whose display has been set to none.
CSS file
myStyle.css
1 2 3 | canvas {
border: 2px dotted black;
} |
We assign 2px black dotted border to the canvas present on our HTML page.
JavaScript file: Circular Clipping Path
myScript.js
1 2 3 4 | var myImg = document.getElementById("myImg");
context.arc(200, 200, 180, 0, 2 * Math.PI);
context.clip();
context.drawImage(myImg, 0, 0); |
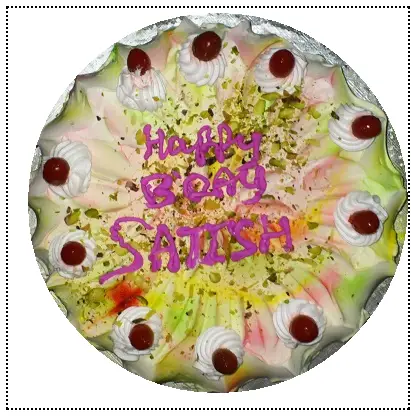
This creates a circular clipping region, with a radius of 180px. We use drawImage() method to draw the image. Clip() method is used to create clipping region.
JavaScript file: random Clipping Path
myScript.js
1 2 3 4 5 6 7 8 9 | var myImg = document.getElementById("myImg");
context.beginPath();
context.moveTo(50, 30);
context.lineTo(30, 250);
context.lineTo(390, 350);
context.lineTo(399, 30);
context.closePath();
context.clip();
context.drawImage(myImg, 0, 0); |
This creates a random region, which is then clipped and the image is drawn inside this random clipping region.
Related: Canvas Lines and Paths: HTML5
Clipping Paths in Canvas: HTML5
[youtube https://www.youtube.com/watch?v=_2HzJJ7R8sM]
drawImage() Syntax
context.drawImage(img,sx,sy,swidth,sheight,x,y,width,height);
sx – The x coordinate where to start clipping(optional).
sy – The y coordinate where to start clipping(optional).
x – The x coordinate where to place the image on the canvas.
y – The y coordinate where to place the image on the canvas.
swidth– The width of the clipped image(optional).
sheight– The height of the clipped image(optional).
stretch or reduce the image
width– The width of the image to use(optional).
height– The height of the image to use(optional) .
JavaScript file: Full Code
myScript.js
1 2 3 4 5 6 7 8 9 10 11 12 13 14 15 16 17 18 19 20 21 22 23 24 25 26 27 28 | window.onload = canvas;
function canvas()
{
var myCanvas = document.getElementById("myCanvas");
if( myCanvas && myCanvas.getContext("2d") )
{
var context = myCanvas.getContext("2d");
var myImg = document.getElementById("myImg");
context.arc(210, 195, 190, 0, 2 * Math.PI);
//context.beginPath();
//context.moveTo(50, 30);
//context.lineTo(30, 250);
//context.lineTo(390, 350);
//context.lineTo(399, 30);
//context.closePath();
context.clip();
context.drawImage(myImg, 0, 0);
}
} |
Note: By default, current clipping path is the entire canvas. Clipping path is a region inside which drawing takes place, outside which drawing has no effect. Any path can be a clipping path. You simply draw a path as normal and then call the context’s clip method to clip the region. With this clipping path, we can restrict the drawing to a particular area on the canvas.